One of my most popular blog posts, and certainly the most consistently popular, was about the process of
repairing an antique soda siphon. That was just over 6 months ago. Since then I have had to make a couple more repairs. I have also learned a few things – some from comments left by readers of that post. Because that posting has proven to be so popular (who knew so many people wanted to repair old soda siphons) I decided it was time to post an update with new photos and new information.
DISCLAIMER: The information provided here is for
entertainment purposes only. I do not know if the materials used by
Sparklets, or any other early soda siphon makers, meet current standards for
safety for drinking water. Furthermore, the gasket forming materials used in
this project are not labeled for use in contact with food or beverages. If you
should attempt to repair your own soda siphon using the information below,
whether successful or not, I guarantee that you and everyone you know will die
a horrible death in screaming agony. You have been warned.
After repairing my Sparklets siphon with my re-created rubber components, it worked well for several months. However, eventually the gasket at the gas input port blew out. I took another look at the original (which I had saved.) It was clear that my original casting was rather crude, missing some fine details of varying thickness on the outside of the part. I decided to re-cast it, putting only the thinnest possible layer of Vaseline on the original so that the fidelity of the part would be maintained. After re-casting, I also carefully ground and polished out the surface of the plaster to make the ridges as robust as possible.
When it came time to make the new part, I followed the advice of a commentator on my original post. He noted that my problems with getting the gasket forming material to harden were the result of using Vaseline on the mold as a mold-release. I removed every trace of Vaseline left over from casting the part, and I used a non-petroleum lubricant as suggested - I skipped the cornstarch additive. It took a couple of days for the part to set up. Even with all that time I had to remove the top of the mold to allow the rest to fully cure before removing the newly formed gasket from the bottom half of the mold. It was also much more difficult to get the part out than it had been with Vaseline. However, the resultant gasket was much firmer and sturdier than my prior component.
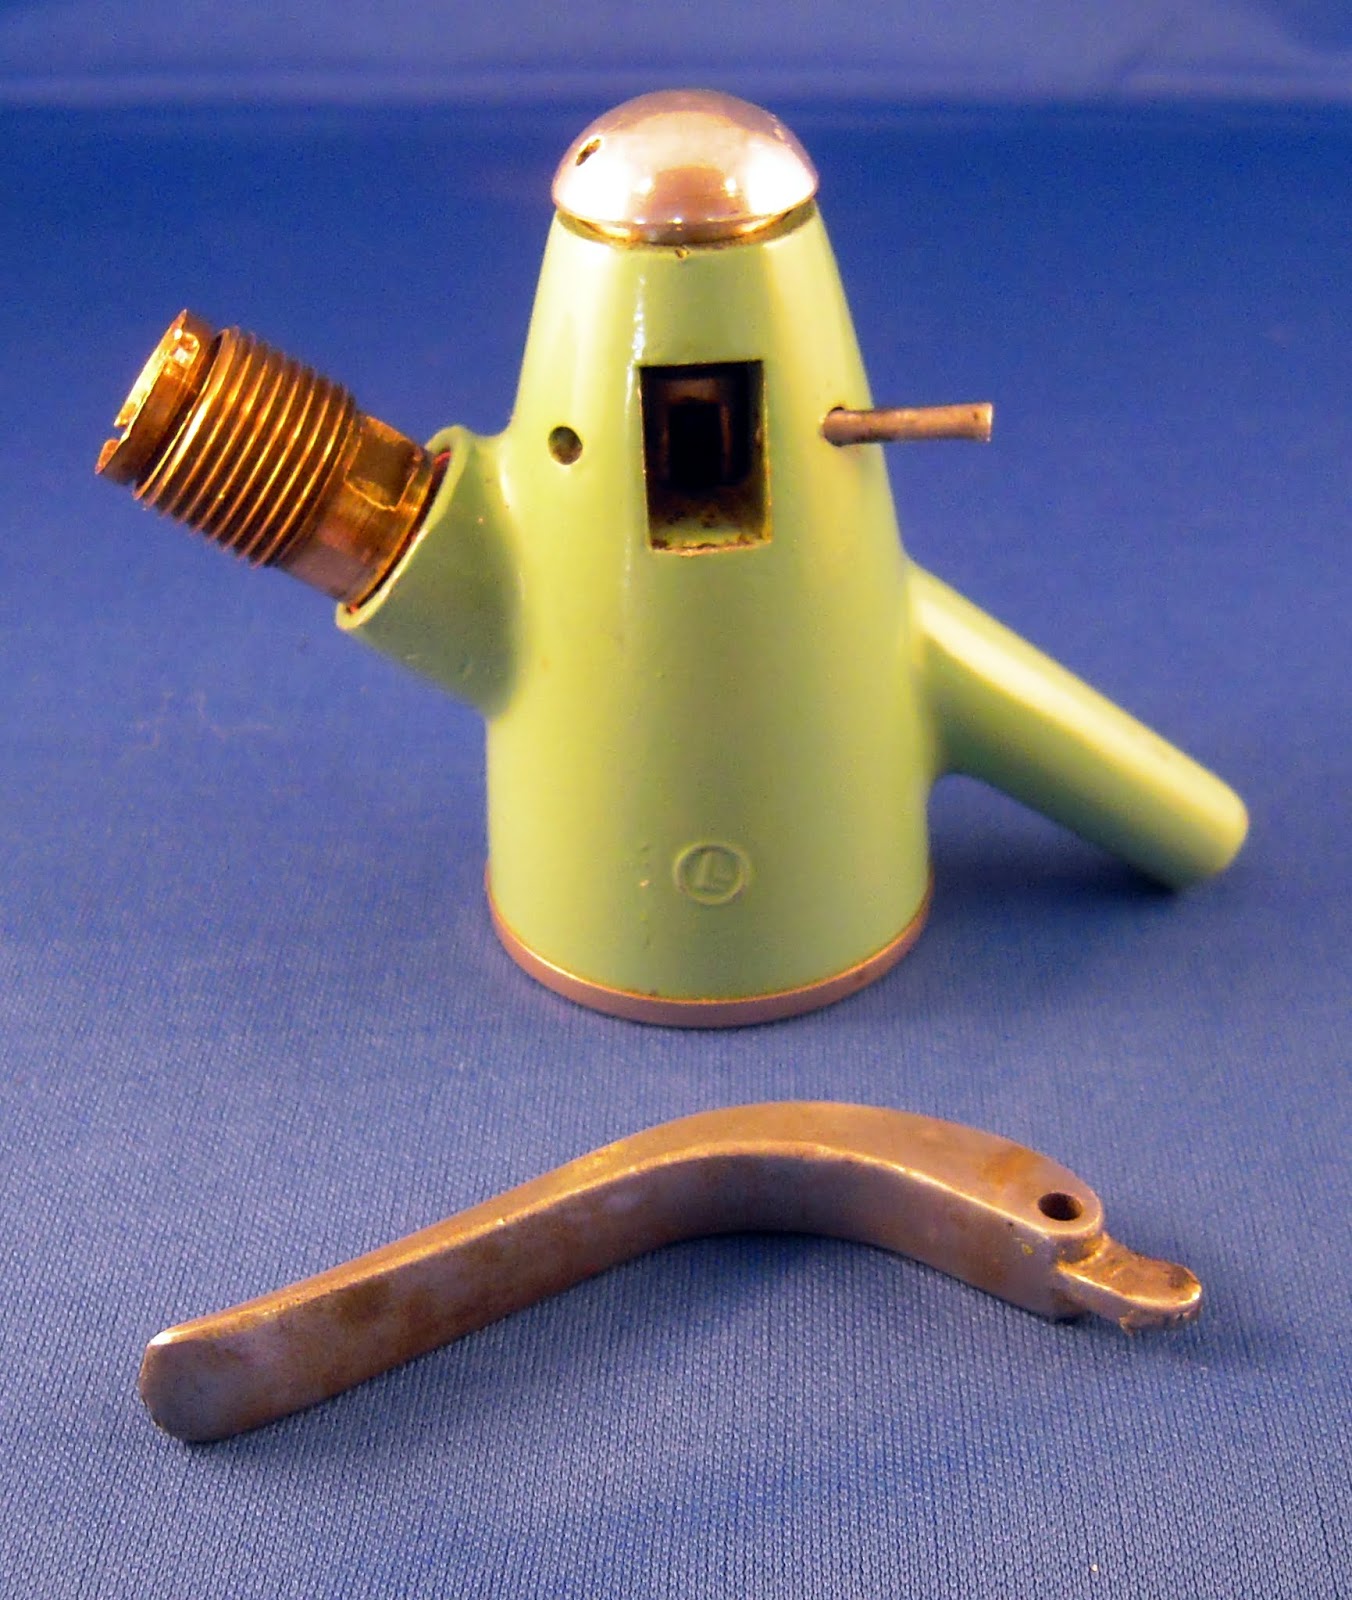
 |
| Siphon head, charger piercing pin, gasket, and retaining ring. |
Given the quality of this new piece, I also re-cast the gasket for the top of the bottle. Because of the problems getting the gasket material to set, I decided to add just a small amount of cornstarch. It still took a long time to cure (though not as long) and the part was strong and high quality. I believe that a bit more experimentation could come up with the perfect corn-starch to gasket forming material ratio. If any readers have been playing with this, I’d love to hear what you have found.
 |
| My new bottle top gasket |
 |
| The bottle top gasket on its glass rod |
A second problem also arose during the past months. Water began spurting out from the gas port every time I attempted to carbonate. I suspected the interior stopper had gone bad again. However, when I took everything apart it all looked fine. When I had originally disassembled the siphon I skipped removing the gas port from the siphon head. It had been completely frozen in place, and it hadn’t seemed to matter. At this point, with nowhere else to look, I realized that it had to come out.
 |
| An 11mm box end wrench fits the indents on the gas inlet |
I saturated the part with 3-in-1 oil and waited. After a day I tried to unscrew it using an 11mm box end wrench. No luck. It was stuck fast. I applied more oil and gave it another day. Still no joy. Finally I put the whole head into a bench vice (protected by blocks of wood), fit the wrench to the gas input port, and hit it with a hammer. A couple good solid whacks broke the gas port free of its decades long embrace.
 |
| All the parts inside the gas inlet |
Inside I found a completely degraded red fiber gasket, corroded aluminum threads, and a rubber topped plunger set on a spring. Immediately the rubber crumbed into dust. The fiber gasket was easy to replace (though I had to ream the replacement out slightly to make it fit.) For the destroyed rubber disk I took a piece of sheet rubber from my collection of odds-n-ends. A 7mm hole punch produced a disk of exactly the right size to sit on top of the plunger without impeding movement within its channel. Carefully I scrubbed out all the corrosion, put the system together with all of the new parts, and resumed cheerfully making Sparklets soda.
 |
| A 7mm hole punch makes just the right size rubber disk |
I hope these new tips and photos are helpful to people that may be attempting a similarly foolish project in their own homes. Enjoy!
Some of the most frequent questions I have received pertained to dissasembly of the siphon head. Here are some additional photos showing some of the steps.


Dear Andrew, what an excellent and informative blog! I am having a few problems with my old sparklets - not as ancient as yours by a long chalk! I was wondering if I sent you a photograph of the parts in question whether you could give me some advice?
ReplyDeleteI can’t guarantee anything, but I am happy to try.
ReplyDeleteYou should be able to reach me through my blogger profile and either send me the photos, or send me an email address where I can reach you (you posted as "anonymous")
I stumbled across your blog while doing a search for vintage soda siphon systems. A little unrelated to your customer repair post above, do you happen to know if anyone still makes systems like this? We have a customer looking to produce a product that would go into a vintage looking bottle and they would like the spout to look like a vintage siphon. Didn't think it would hurt to pick your brain about this.
ReplyDeleteMarcia
m.chaloux@mnabax.com
Hello from Down Under! I have exactly this problem - bought a retro soda siphon but the gasket/rubber bits are worn out. To make matters worse, my husband said, oh, it doesn't work because someone shoved chewing gum in there and gouged it out. I suspect that WAS the gasket.
ReplyDeleteWe are not even going to try to fix it but thanks for a great article. I enjoyed reading it and I take my hat off to people who just won't let it rest :-)
Hello Andrew,
ReplyDeleteI read your previous post on the restore. I see now that you have plated everything in copper. Did you do that yourself and if so, how?
Thanks!
Pat
Hi Pat;
DeleteThe parts are all either aluminum or brass, none are copper or copper plated.. Perhaps something about my camera vs. your monitor is making them look like they are copper.
Andrew
Hi Andrew,
ReplyDeleteJust wanted to say thank you for the information - it was very helpful in repairing an old chrome soda siphon of my parents, of 1960's vintage.
It's great that there are people like you prepared to take the time to impart their knowledge on the web and I wanted to show my appreciation :0)
Many thanks again for your help and seasons greetings to you.
Kind regards,
David (in Scotland)
Hello, your post is great. It helps a lot to encourage us to repair our siphons. It has every detail of you experience and your pictures has an amazing resolution. Thanks a lot!
ReplyDeleteI have a question, my siphon has the plunger seal damaged, it also was made of a rubber that has been completely torn in pieces, so there is no chance to make a cast. Have you found a replacement for that seal?
Regards,
Andrés (in Venezuela)
I am currently putting together the tooling to make gaskets for my syphone, I have complete gaskets so when I have everything made I will be able to make the gaskets out of silicone
ReplyDeleteHi, another commenter front Down Under .... I am hoping to restore a similar syphon that has 'chewing gum' style gaskets hence nothing to follow. Was thinking a machinable rubber on a small lathe but looking for gas seal dimensions to work from.
ReplyDeleteWould love to hear of other's success in replacing the gaskets and making the antiques functional. Anyone producing these parts for sale?
ReplyDeleteI am looking for any American seltzer siphon service, but, fwiw, there is a company in the UK, Acqua Spumante that offers parts, and service for setzer bottles. I may end up sending them a seltzer siphon mechanism to be repaired, after contacting them, but they do offer current seltzer bottles in a wide range for sale as well. I've no connection with them, just offering advice from what I've seen. Thanks for sharing your experience Andrew!
ReplyDeleteLeo (Nevada)