
Latest Posts

I haven't written a damn thing in a couple weeks. My combined email inboxes now contain over 1500 messages. My friends on Facebook wonder what happened to me...

It's spring time here and I have been spending all of my spare time (and then some) in the garden. The urgency is particularly great with the Hillside Gardens tour just one week away (I was interviewed for the local newspaper yesterday - nice.)

While I still have a lot to say, a lot to write, and a lot to cook, spending time outside definitely has advantages over sitting at my desk. Amongst many, many things, I get to see the natural (and naturalesque) world more deeply when I spend my time in the garden. Yesterday I was outside talking to my friend Andy (who is also my landscaper.) I saw a bee sitting on my white lilac but not moving. It was so odd, it was completely immobile, so I went closer to check it out. I realized that it was in the jaws of an almost perfectly camoulflaged spider. Wow! (Note that I cropped the image and increased the contrast in Photoshop to make the spider more visible.)


Creepy but beautiful, and fully part of the natural world. I like the ant peeking out from behind a flower petal just to the upper left of the scene.


Postscript 5/4/11:  Found this on Wikipedia. I think it is Misumena vatia. Apparently this spider can change color at will!


The water feature in my garden.

Busy, busy, busy.

It's spring here in California, and when California springs, it doesn't kid around. I've completely lost count of the number of hours I have spent in the garden over the last two weeks. Weeding, pruning, fertilizing (organic), spraying (Safer Soap, etc.) Then there's "The Farm" - turning the soil, tilling and cultivating, pulling old carrots and planting new ones, planting corn, tomatoes, peppers, cantaloupe, cucumbers, zucchini, patty pan squash, herbs... Then there's the spring harvests - crazy amounts of chard and fava beans. On top of that I have to do something with all that food.

Busy, busy, busy.

Spring in the garden is always a busy time, but this year it is doubly so because my garden will be featured in the Hillside Gardeners of Montclair garden tour, May 1. This is a wonderful tour of gardens in Oakland's Montclair district that raises funds for various horticultural educational projects. I'm very pleased and honored to have my garden on the tour. However, it is an extra challenge because I want to time things so that by May 1 my garden looks perfect, but I also want it to look untouched. Perfect but effortless. No easy feat.

As if that weren't enough, I noticed that the Hillside Gardener's of Montclair didn't have a web site (tsk, tsk.) To my surprise, HillsideGardeners.com was available! So, I registered it and created a web site for them.

Busy, busy, busy!


Congratulations to The Tomato Tart and all the many chef/bloggers who made this happen.  Wow!

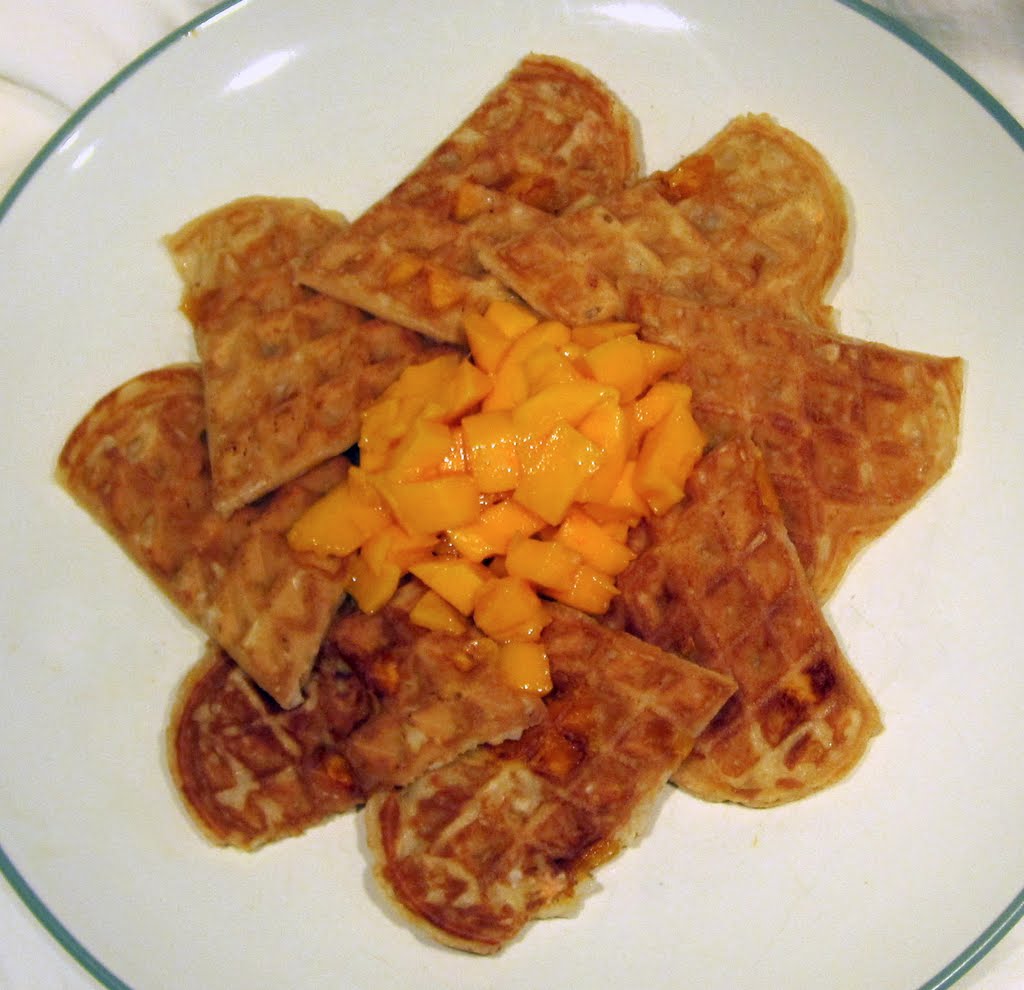
The Uncarved Block Waffle
Aka The "Andrew Needs Adult Supervision in the Kitchen Waffle"

Finally, The Uncarved Block Waffle! It's not an easy waffle to make, but for the official waffle of The Uncarved Block, why should it be? It is fluffy inside, crispy outside, and sweet with a multi-layered flavor. It is a profound waffle. (Not at all modest, am I?)

Wet Ingredients:
  • 1 whole egg
  • 1 13.5oz can of coconut milk (As with so many products, Chaokoh has downsized their coconut milk instead of increasing the price.)
  • 2 Tbs unsalted butter, melted
  • 1 tsp Tahitian vanilla
  • 1/8 cup Malibu coconut rum
  • 1 cup fresh, ripe sweet mango, medium dice
  • 1 cup cooked white rice (preferably Jasmin)

Dry Ingredients:
  • 1/2 cup rice flour (NOT glutenous rice flower)
  • 1/2 cup all-purpose flour
  • 1 tsp sugar (heaping)
  • 1 tsp baking powder
  • pinch salt

Method:
Preheat waffle iron (the first step in all waffle recipes, doesn't this go without saying?)

Whisk the egg, coconut milk, vanilla, butter and rum together in one bowl (note: the butter should be melted but not hot). Then gently add the mango and rice. Sift together the dry ingredients in another bowl, making sure they are thoroughly combined. Add the wet ingredients into the dry ingredients, stirring until fully combined into a thin batter, but without beating up the mango too badly. Note that there aren't many glutens present, so you don't have to worry too much about overworking the batter.


The last instruction in most waffle recipes is "Make waffles according to waffle iron manufacturer's instructions," or some such. However, for this recipe do NOT necessarily follow the the manufacturer's instructions.


I recently got a fancy schmancy new waffle iron that purports to tell you when your waffle is ready (the Chef's Choice M840.)  I don't know how it decides when the waffle is done. Perhaps it thinks it is done when the heating element returns to a certain temp after being cooled by the batter? Maybe it is just a timer? I don't know. But, in any case, this is a very moist dough and the mango and rice are full of water. The Chef's Choice instructions say that you should not watch for the steaming to slow or stop as with old fashioned waffle irons, but rather to open the iron and remove the waffle when the buzzer sounds regardless of steam. With this recipe, if you follow those instructions, you get a waffle that comes out beautifully crisp, but 10 seconds later it is a soggy noodle.

My best results come from setting the M840 at #4 (out of 5) darkness, and letting it go through two whole cycles before removing the waffle. Also, placing the waffles on a cold plate causes instant condensation and sogginess. Resting them first on paper towels cured this problem.  If you have an "old fashioned" waffle iron that requires you to pay attention, wait for the steam to dissipate as usual but be prepared for it to take a relatively long time.


Serve with fresh fruit (preferably more mango,) or powdered sugar, or both. Maple syrup is definitely not recommended.

Notes:
  • The rice must be cooked, but need not be freshly cooked. Last night's left overs are fine.
  • This can result in a very thick batter depending on a lot of factors like weather, water content of the flour and the rice, etc. Add water to thin the batter down as needed.
  • If your waffle iron has a temperature adjustment, you may find better results at a lower temperature than usual (and longer time) to allow the center of the waffle to cook thoroughly.
  • I like Tahitian vanilla for this recipe. It has a sweet cherry-like tone that I find goes nicely with coconut. If you don't have Tahitian, Madagascar will do.
  • Don't use glutinous rice flour, it is just too gloppy.

Why have I developed this wild craving for root beer floats? I've no idea. If you figure it out, please let me know.

Here then is the official Uncarved Block Adult Root Beer Float (tm)

Ingredients:
1 bottle Virgil's Root Beer (or equivalent boutique root beer or homemade)
1 scoop homemade coconut sorbet (see below)
1 jigger Malibu coconut rum (or equivalent), more or less to taste
1 bendable straw.

Method:
Add Malibu and a few ounces of root beer to a tall glass and mix (mixing destroys the carbination in the soda, so we "sacrifice" a few ounces to help the mix.)
Place a scoup of coconut sorbet in the glass. Top with root beer. Note that with any root beer float, the root beer will foam up quite a lot, so add slowly, and as a precaution do this in the sink or on a towel.

Insert a bendable straw (this is vital!) Enjoy.

------------------------

For my coconut sorbet I start with Ming's Perfectly Simple Coconut Sorbet from Food.com, but there are two things I don't like about this recipe. Most important I feel like there is much too much shredded coconut. I also find it too sweet. Nonetheless, it could hardly be easier. So, check that out and note my comments on that page.
The Uncarved Block is helping to sponsor the Online Bake Sale for Japan!


As you may have heard, there were some technical difficulties with the online bidding software, so the auction was delayed and began yesterday at 12:00 Noon.  It ends today at Noon, so, as I write this, you have just under 3 hours to get your final bids in. Already several items have sold through the $250 "buy it now" option!  It looks like the auction is going to be a smashing success helping to raise money to feed people effected by the earthquake in Japan.

I want to say "your welcome" and "thank you!" to all the people who have thanked me for my contribution. I am really happy to have been able to contribute to this effort. Thank you for your comments.

I also want to send out my own "thank you" to all the many blogger/chefs that contributed their creativity and labor, and most of all to Sabrina at TheTomatoTart.com. Lots of people have ideas like this one, very few carry through and make it happen! Sabrina is one of those few that can both have a vision and see it through.
The Uncarved Block is helping to sponsor the Online Bakesale for Japan!


The Uncarved Block is matching the first $500 that is raised tomorrow through the TheTomatoTart.com's online bakesale for Japan!


A few weeks ago I posted a blog about gin flavored waffles. I decided to submit it to PunkDomestics.com in their "Infusions and Liquors" section. I knew that it didn't really count as an infusion or liquor, but it seemed like such a unique way of using gin that they might like it anyway. Well, it wasn't much of a surprise that gin flavored waffles didn't fit the criteria for PunkDomestics. However, they did say that if it had been waffle flavored gin that would've been another story. Of course, waffle flavored gin is a ridiculous notion. Or is it? Waffle flavored gin? It was too much of a challenge to ignore. So I sat down with some waffles and a glass of gin and thought about what waffle flavored gin would be.

The biggest hurdle was that waffles themselves have a very subtle flavor. They are really much more about texture than taste. Making a waffle flavored liquid inherently eliminates that textural element. Perhaps
Nathan Mhyrvold has some magic that will give a liquid the texture of a waffle. If so, I am not privy to it.

But what about the flavor of a plain waffle; assuming there are no berries, nuts, or other flavorings added, an unadorned waffle is slightly sweet and has nice elements of caramelized flour. That's about it. It is a "quick bread," so there is no yeast involved and none of those yeasty flavors that you get in bread that uses "biological leveners." The egg and milk in a waffle seem to contribute little or nothing to its flavor. There are subtleties to waffle flavor that can make one waffle better than another, but unless we're talking about a burnt waffle, they are all so delicate that alcohol obliterates them. I concluded that waffle flavored gin was about the experience of eating waffles and drinking gin, not about trying to actually make gin take on the flavor of a naked waffle.


Most of us in the USA use waffles as a substrate for butter and syrup. A quick survey of some of my waffle-loving friends confirmed that they prefer waffles to pancakes because the texture is crunchy and the holes hold onto the melting butter and maple syrup. Since crunchiness was already ruled out, it seemed to me that it was butter, maple syrup, and caramelized flour that would define the waffle eating experience in a liquor.

The next question was the gin. The most common type of gin in America, London dry gin, is a spirit with a fairly high alcohol content infused with herbs, principally juniper berries. The flavorings other than juniper in gin vary from maker to maker. Taken straight, gin is a very powerful flavor. There was no way that any component of the "waffle experience" would survive infusion into gin. I decided that for my waffle flavored gin I would start with relatively flavorless vodka and add elements of juniper and waffle in a way that would provide a pleasing balance.

What follows is my experiment creating waffle flavored gin. To be honest, when I started I did not expect to succeed. However, to my surprise I did indeed create an alcoholic beverage that I believe provides the experience of waffle flavored gin. Is it good? I think so. Would I want to drink it every day? No, not really, its a bit on the sweet side. Is waffle flavored gin a good idea? Well, that's for you to decide; all I can say is that waffle flavored gin turns out to be feasible, whether or not it is desirable.

I'm afraid there are no measurements here – I played it entirely by taste, you'll have to do the same.

For the "waffle experience" I started by coarsely shredding a waffle and putting it in a pint mason jar. To this I added a couple tablespoons of maple syrup and two or three tablespoons of ghee. I used ghee because I wanted that buttery flavor, but I was worried about butter going rancid. I figured ghee in alcohol in a closed container would last just fine at room temperature, and I was right.


For a mild gin flavor that wouldn't overpower the waffle, I added 4 or 5 juniper berries, a fresh bay leaf (true bay – Laurus nobilis,) some nutmeg, and a sliver of lemon zest. To me, gin always has a certain pine-like quality. I considered adding pine needles, but ruled that out as too unpredictable, so I tossed in a small piece of chios masticha (gum mastic) instead. [Note: all of these quantities are small. I didn't want to make a large batch because I really exected that in a few weeks I would simply be throwing out a jar full of disgusting mush.]


I filled the jar with Smirnoff vodka, sealed it, and let it sit, shaking it and tasting it from time to time. After two weeks I felt like the maple, butter, and mild-gin flavors were pretty much there, but the waffle was almost imperceptible. I strained out the ingredients and then poured the liquid over a fresh waffle in a new jar to double-down on that element. About a week later my palate said that all the elements were there, so I put it through a coffee filter and declared it ready to face a waiting world.


An alcoholic infusion that is reminiscent of gin and the "waffle experience?" Who knew?


One final thought – if I try this again, I might forego the gin infusion elements and simply infuse the waffle flavors then add gin to taste.

I replace my herbs and spices on a regular basis. The whole point of herbs and spices is that they're full of volatile flavonoids. If they weren't volatile we wouldn't be able to smell them or taste them as strongly as we do. Their volatility (ability to be easily vaporized) is both their strength and their Achilles' heel – these flavors which we prize breakdown quickly. Unfortunately, herbs and spices have a second drawback: they tend to be expensive.

A couple of years ago I was at my local Whole Foods (then the one in Berkeley, California,) replacing my collection of aged spices. Along with my other grocery items I had a jumble of little glass bottles of spices in my cart. Heading towards the produce department I noticed the display of bulk herbs that I had never paid attention to before. I had often bought cereal, grains, and dried fruit from Whole Foods' bulk bins, but somehow the herb department had slipped my notice (possibly because at the time it was located in cosmetics and medicines, with culinary and medicinal herbs intermingled – in Berkeley it has since been relocated to the same place as the other bulk foods.)

This particular day, having noticed the bulk herbs and spices for the first time, I decided to compare what I had in my cart to what was being sold in bulk. I was stunned at the price differential. I knew that the bulk grains and fruits were cheaper than their prepackaged counterparts, but the difference in cost for herbs and spices was astounding. I filled baggies with all the products I needed, then returned those little glass bottles to the shelves where they belong. At home, rather than throwing away the old bottles and replacing them with new, I poured out the old contents, refilling the bottles with the fresh, vibrant, herbs and spices I had bought in bulk.

Recently, I was at Berkeley Bowl (a local natural grocery store.) In their bulk department I noticed a bin of large grain sea salt. I was out of sel gros and had it on my shopping list. The price at Berkeley Bowl for sea salt in the bulk department was $.80 a pound. The price for my usual brand was $4.99 for a 1.5 pound canister. So now I am buying my salt in bulk too.

There are two other great benefits to buying in bulk; first, you can buy much smaller amounts of those spices you use infrequently. I’ve never made it through a bottle of cloves before I considered them too old to use. Now I buy half an ounce at a time, so they’re always super-fresh and there is no waste. Also, I am no longer disposing of all those bottles. Sure, they don’t amount to much in the grand scheme of things, but every bit helps.

When I tell people about this they are almost universally as surprised as I was. So I figured I would pass on the tip – just remember, if you're shopping at Whole Foods in Oakland or Berkeley, or at Berkeley Bowl, leave some for me ;-)

For illustration, the following are some of the prices for a few bulk spices and for salt from the Oakland Whole Foods, and their corresponding prices for those products in packages. Note that sometimes there is not a perfect comparison, as in many cases the packaged product is available under different brands at different prices. These numbers are solely for illustration, prices in your area and for your favorite brands will certainly be different. For convenience I have converted all weights to ounces. [Check out the vanilla for the truly crazy price difference.]

Item
Bulk
Packaged
Notes
Allspice
 $   1.75
 $   6.23
2.49/0.40oz bottle
Clove
 $   1.10
 $   3.33
4.99/1.5oz bottle
Ground cinnamon
 $   0.62
 $   3.33
4.99/1.5oz bottle
Black peppercorns (Tellicherry)
 $   0.80
 $   3.33
4.99/1.5oz bottle
Paprika
 $   0.81
 $   2.36
6.99/2.96oz can
Madagascar vanilla
 $   9.37
 $ 35.94
5.99/1 bean in a bottle, ~6 bean to 1 oz
Sea salt (gros)
 $   0.05
 $   0.21
4.99/1.5lb package


I mentioned in my original blog entry about the Herb and Seed Cleaning that I wasn't satisfied with the way I had used a cardboard box to act as the catch basin and hold the levels in place. It worked, but it was a clunky hack. I had a large sheet of Masonite lying around, so I used some of it to make a base for the unit and as side-panels to hold the levels together. It still ain't headed for the Museum of Modern Art, but it is now a much slicker, cleaner implementation, and stores more easily as well.


For the base, I simply cut a rectangle of the appropriate size and nailed it on with 5/8" bright wire nails. The pieces of Masonite that act as guides/braces for the sides are just 3"x3" squares screwed on with a variety of small screws from the big can-o'-miscellaneous-screws.

If you have any more improvements to suggest, please let me know!


UPDATE: November 2013:

I decided to an additional top level to my herb and seed cleaner. This new level uses chicken-wire as its screen. There were several cases where I wished that I had a very gross first filter; notably peas and beans, and also seeds like basil where the seedpods remain attached to a long flower stalk. My new chicken-wire layer catches many of the large pea and bean pods, and the dried flower stalks of basil, dill, and other plants. A fair amount of unwanted material does fall through the large gauge of the chicken-wire, but it catches enough big pieces to make further processing at the 1/4" hardware-cloth level much easier.