Some three years ago I built my first composter. Prior to that I had been buying and using commercial composters. None of those managed to get the compost hot enough, so it took forever to break down and weed seeds weren't killed. After attending a class on composting, I decided to build my own compost bins based on plans that were provided. However, I wasn't satisfied with those plans, so I redesigned it, and posted my version on this blog.
It worked well, but, over time I learned more about composting in my garden, and how my composter design fared. Among other things, two bins holding one yard each just wasn't enough for the quantity of material my yard was producing. Also, I decided that I did want a third bin to hold completed compost - a feature I had deleted from the original plans. Yes, it does take space, but, I needed somewhere to put the completed compost until I was ready to use it. Another problem with the prior design is that it didn't hold enough moisture. It used a lot of chicken wire (or hardware cloth) instead of wood. I'm not sure what environment they had in mind when they designed it that way. Not knowing any better, I followed their instructions and used wire mesh for four sides of my composter. Over time I replaced the two short sides with wood, and added irrigation to keep the compost moist and cooking. I didn't want to make the same mistake this time - only solid sides for the new composter.
Another problem was that I had used pine. I knew that pine wouldn't last, but, I wasn't sure if I would really be doing that much composting, so I wanted to keep the cost down. Yet another issue resulted from the fact that I built the bin on my nice, level driveway, then carried it down to its resting place in the garden. Unfortunately, I wasn't able to get the ground level where the composter was to sit, so, it ended up at an inconvenient angle and twisting to conform to the uneven spot. Over time I added and removed wood panels and screws to accommodate the bending, but, there was no doubt that its days were numbered, both by choice of materials and location.
Earlier this year I demolished the old composter and spent a couple of months building The Grand-daddy of All Composters. It is a huge three-bin affair that holds about 4.5 yards of material. I had originally intended to build it using mostly cinder blocks. However, I was fortunate in being able to acquire a supply of thick, large redwood boards from a neighbor. These were a great resource, enhancing my design, and saving a ton of money. My neighbors had recently renovated their 1950's home and had the contractor save any good redwood that came out of the house. It was a great idea to save it, but they didn't actually have a purpose for the wood, so they were happy to give it to me to get it out of their yard, where it had been sitting for some time. It took a lot of effort to remove vast numbers of nails, and there was a certain amount of planing involved, but getting all that old, structurally stable redwood was a huge win. They also had an old security door which turned out to be a great resource for screen panels. I had my own supply of redwood 4x4's left over from a prior project - another savings.
Note that unlike my prior composter design, I am not including any plans. This design is predicated on the particulars of the location, and the type and size of materials I had available. So, it is unlikely to generalize for other's use without significant modification. I am presenting the project here in the hope that some of the methods, tools, and ideas might be reusable in other contexts.
 |
| The cinder block frame for the foundation |
The first thing I did this time was to build a foundation as a base for the composter. I built a cinder block wall and drove rebar several feet into the ground through some of the blocks. After mortaring the cinder block, I then filled the holes with concrete. Granted this could be overkill since I am not building a structure for habitation. However, since I live in an earthquake zone, I didn't want my compost bins to someday slide down the hill and move into my neighbor's garage.
 |
| The cinder block frame for the foundation - front view |
I spent quite a while trying to decide what to use to fill in the foundation. Initially I planned on just building the cinder block wall, and filling it with compost, but, I had a few considerations. Among them, that seemed like a waste of really good compost. I preferred to use the beautiful compost from the prior bin in my garden. Also, when turning, moving, or harvesting compost, it wouldn't be obvious when to stop digging. Lastly, I didn't want to make it too easy for rats to burrow up into the bins from below and make nests. I could have put down chicken wire or hardware cloth on the bottom, but, as I had learned, that rusts and deteriorates over time. Also, any such material catches the tines of a spading fork.
Soil, rock, and concrete are expensive and heavy (surprisingly, in bagged form, concrete is the cheapest of the three.) In addition, bringing in soil had most of the same negatives as using compost. And, I didn't relish humping buckets or bags of any such material down to the bottom of the garden where the composter was to be located. There was also cost; buying enough bagged soil or rock would have been crazy expensive, plus the cost of moving it; though loose material is cheaper, paying for delivery would have been expensive, not to mention the time & cost of carrying buckets of material from where ever it was dumped.
Checking on craigslist, I found someone giving away "urbanite," less than a mile from my home. ["Urbanite" is a neologism meaning "broken pieces of unwanted concrete leftover from a demolition project".] While urbanite is heavy to lug around, it had the distinct advantages of being (1) free, (2) a good act of recycling, and (3) relatively easy to carry in blocks. So, I used this found material for filling in the foundation. We filled in the space with as many of these chunks of old concrete as we could, then topped with a few bags of base rock.
Side note: I seriously considered using Styrofoam blocks to fill the space. Styrofoam is light, and I have a lot of old Styrofoam squirreled away in case I ever move again. However, I couldn't find out much about how Styrofoam would behave with concrete poured on top of it, and I really didn't want to have the whole thing collapse some day if the Styrofoam broke down.
 |
| The foundation partially filled with "urbanite" |
Mostly we just stacked and piled hunks of old concrete into the hole, but, in some cases, a little extra finesses helped.
 |
| Here I am working with a stone chisel making a few of the pieces fit "just right" |
 |
| The foundation filled with urbanite and topped with gravel before topping with concrete |
To be honest, I completely lost count of the number of bags of concrete we mixed. Dozens? Fortunately, Nick, my gardening assistant, became quite expert at the task.
 |
| My assistant, Nick, mixing concrete |
 |
| The finished foundation |
Though I wanted a surface that would make it easy to manage the compost (i.e. not wire mesh), and wouldn't let rodents in, I also wanted the compost to be able to "communicate" bacteria, moisture, and worms with the underlying soil. So, we made a number of holes in the concrete as it was setting (hopefully none big enough to let rodents in.) The urbanite chunks made this a challenge, but, we were able to force rebar through to make the holes.
The main structure of the compost bin is based on 4x4 redwood fence posts. To hold them in place they are screwed and/or bolted onto supports. Three of the four posts are free-standing - without panels connected to them. To support those posts I used larger and more expensive brackets that were set directly into concrete. Only one of these three were set into the cinder block wall, so, for the other two, we needed to build frames and pour concrete footers to hold them.
 |
| Heavy duty fence post bracket set in concrete footer |
The remaining five posts would get some support from the wooden walls of the bins. For those I didn't need as beefy (and expensive) supports. Instead I embedded bolts into the concrete that I poured into the cinder blocks. Afterwards, I screwed the brackets down onto the bolts. Note that this also required that I drill holes into the ends of the redwood posts to fit over the nuts and bolts sticking up. Hopefully this will not introduce a point of rot.
|
|
| Lighter fence post bracket for posts that don't need as much support
|
 |
| Redwood 4x4 bolted and screwed onto light weight bracket |
We spent considerable time making sure that the 4x4's were lined up, of the same height, and properly oriented to each other. Any error now would certainly translate into pain later on.
 |
| Using a string to make sure the posts are lined up |
 |
| All the posts installed on the foundation |
Once the foundation was done and all the posts were secured to their brackets, it was time to begin cutting and planing the reclaimed lumber, and attaching it to the non-removable sides. Note that only the back and one end are attached to the posts. Every other panel - inside and out - is removable. We made the right end removable because interference from the tree would have made accessing that bin from the front a general pain in the butt. [Side note: subsequent to these photographs, we poured a concrete step on the right hand side.]
 |
| Boards attached to the back posts to make up the rear wall |
The bolts used to attach the 4x4's to the brackets meant that bottom panels needed to be notched. In some cases I simply cut out an appropriate chunk of the board. In other cases I went entirely crazy custom fitting the pieces.
 |
| The bottom panels had to be notched to fit over the post bolts |
Another of the big challenges was how to create tracks to hold the removable panels. In the previous composter, the removable panels were slid between a 2x2 and the front 2x6. In that design there were only two removable panels requiring only four pieces of 2x2. At 35" each, I could get two out of a single 2x2x8. No big deal. In this case I had six removable panels, and the way I designed it, I would need two tracks for each end of each panel. As built, these bins are 42" tall. That meant I needed 24 pieces of track material at 42" each. Using 2x2's would have required 12 2x2x8's, which in redwood is crazy expensive. I started looking around at various kinds of metal brackets, including things like carpet runners and door frame insulation. In each case I kept on blowing past $100 for these tracks alone! Anything even halfway descent in cost was flimsy and likely to corrode. Moreover, the more expensive solutions also seemed like they would be a pain to cut and install.
Then, while walking through Home Depot I had an epiphany: PVC pipe. PVC pipe wont break down in contact with soil and moisture - that is the environment it is made for! The material is slippery enough that wooden planks would easily slide by without binding. They are easy to cut and not hard to drill either. Best of all,10' lengths of PVC are cheap. I also realized that they didnt really need to go all the way to the tops of the 42" 4x4's in order to hold the panels. By cutting them into 40" segments I was able to get three pieces from a single 10' pipe. I bought eight 1/2" PVC pipes and cut them into the 24 40" pieces that I needed. I then pre-drilled them and screwed them to the redwood 4x4's. Note: I found that the easiest way to drill the PVC was using a drill press. Once they were all cut and drilled, screwing them into place with decking screws was a snap.
 |
| Using PVC pipe to make tracks for installing removable panels |
 |
| Corner post with PVC tracks on each side |
 |
| PVC tracks for installing removable panels (top view) |
 |
| Non-removable sides in place and removable panels started |
 |
| Nick demonstrating his talents with tools |
The next question related to the panels between the bins. In the prior composter the two bins were separated by a sheet of chicken wire stapled in place. This let the compost in the two bins connect, effectively increasing the total volume of compost cooking together. However, there were some downsides to this arrangement: Chicken wire breaks down - I had to replace it a couple times over the years. Again, tines of a spading fork get caught in the wire (and help to destroy it.) Finally, having a permanent installed barrier between the bins made moving material from one bin to another more difficult.
For the new composter I wanted to have removable internal panels. But the panels also needed to allow for "communication" of bacteria, worms, heat, etc., between the piles. I considered making the bottom halves of the dividers be permanent, with only the tops removable. That could have added support to the structure while still allowing for some increase in the ease of moving compost between bins. However, finding my neighbor's unwanted screen security door changed everything. Security doors are tough and strong and designed to face the elements. It took some time to cut, but, a metal cutting blade on my circular saw did the trick.
 |
| Pieces of screen security door used as internal panels |
Unfortunately, when cutting the door apart, it wasn't possible to cut it in such a way as to retain the bars that gave the door its structure in each of the four panels. Three were fine, but, in one panel I had to just take the screen material and sandwich it between redwood 1x4's. It is hard to tell from the photo below, but, there are two pieces of 1x4 sandwiching a piece of screen. On the back (not visible in the photo), the long edges run the full length. In the front (shown in the photo), the short edges run the full length. Thus, I was able to screw together the two thicknesses of 1x4 with the screen between.
 |
| Building a removable internal panel |
 |
| Internal panels in place |
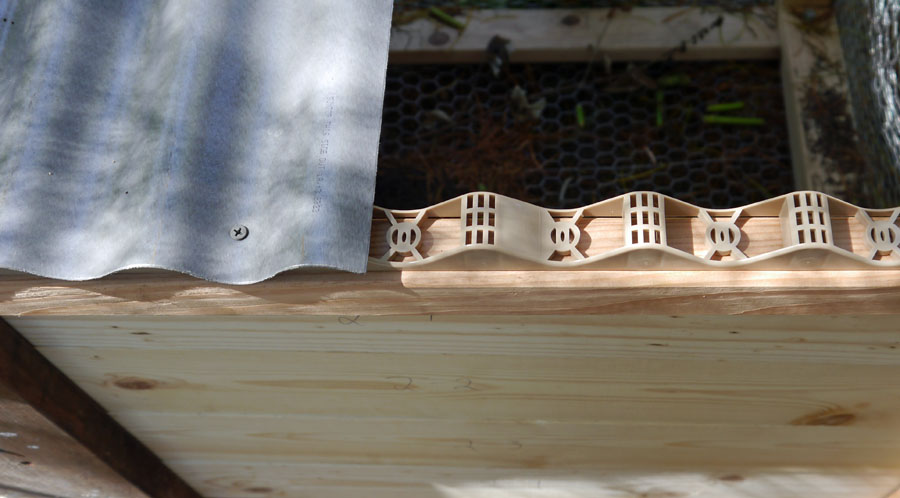
As noted, I had problems keeping the compost moist with the original design of the prior composter. With this composter I closed off all sides to keep moisture in, and added drip irrigation into the lid. I also drilled holes in the lid to allow rain in. During the winter the irrigation rarely runs, but I want the compost to stay alive and keep cooking. By drilling holes in the troughs of the lid material, hopefully enough rain will drip through the roof in the winter.
 |
| Roofing material drilled so rain can enter in the winter |
 |
| Drip irrigation added into the lid |
[Side note: some photos (below) were taken before the irrigation was added.]
Another problem I faced was locating this set of large bins. The slope of the area posed the biggest problem. Any spot with a steep grade meant more layers of cinder block, a deeper foundation, and the need for steps to access the bins. I also needed a location that was convenient for access and would accommodate the work area where I run my chipper. The best location in terms of grade and access had a problem of coming very close to a tree. I considered a variety of options including making the whole composter shorter, narrower, or less deep. I also considered making the first two bins larger than the third bin, either in height or depth. Diminishing the size of the whole thing didn't appeal, as I wanted to thoroughly overcome the size problem of the previous bins. Making the third bin smaller would have required complications in how it mated to the second bin.
In the end I decided to keep all the bins the same size, but, for the third bin, I left off the topmost panel on the front, and I made the lid fold up accordion style, and notched it too. The whole thing works surprisingly well.
 |
| Third roof section hinged and notched for tree trunk |
 |
| Third roof section hinged and notched for tree trunk - side view |
 |
| Third roof section hinged for tree trunk - opening |
 |
| Hinged and notched roofing section opened |
It took a couple of months of planning, drawing, re-planning, and redrawing, purchasing or otherwise acquiring materials, demolishing the old composter, and building the new one. It turned into a huge project building this huge composter. The cost of just the purchased materials was at least a couple hundred dollars, plus several hundred more for my assistant's time. Had I needed to purchase all of the lumber and pay myself for my time, the total cost would have been absurd. But, in the end it was an interesting project, and I expect that it should create great compost for years to come.
 |
| Inside completed composter |
 |
| Completed composter with roofs closed |
 |
| Completed composter with main lid open |
 |
| Making compost |





 Posts
Posts